framemodu
Installation
Install framemodu through Lightroom Classic Plug-in Manager, confirm that the plug-in and local renderer are ready, then export one test photo before a full batch.
Open Plug-in Manager
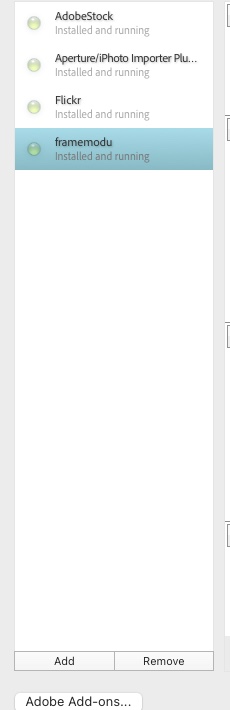
In Lightroom Classic, choose File > Plug-in Manager. Use the Add button at the lower left to select the complete framemodu.lrplugin folder from the unzipped package. Select the folder itself, not an individual Lua file inside it.
- Keep the plug-in folder intact after unzipping.
- Do not move the renderer folder out of the plug-in package.
- If Lightroom asks to update the catalog or restart, finish that host-app step first, then return to Plug-in Manager.
Confirm the plug-in status
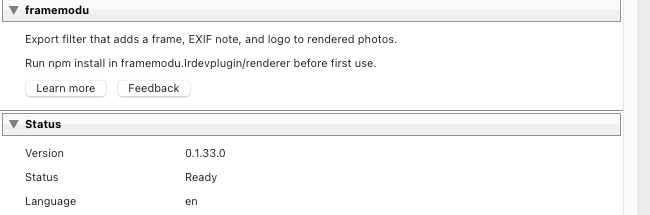
After Lightroom loads the plug-in, select framemodu in the left list. The status panel should show Ready, and the language should match the Lightroom UI language currently in use.
- If the status is disabled, click Enable in Plug-in Manager.
- If the plug-in is listed but not ready, remove it and add the fresh framemodu.lrplugin folder again.
- If localization looks wrong, restart Lightroom Classic after changing the app language.
Check renderer and dependencies
framemodu renders the final framed file locally after Lightroom finishes its own export. In Plug-in Manager, the Renderer and Dependencies rows should both read Installed.
- If either row is missing, reinstall from a fresh package or run npm install in the renderer folder when using a development package.
- The renderer runs on local exported files; normal export rendering does not upload your photos.

Export one test photo
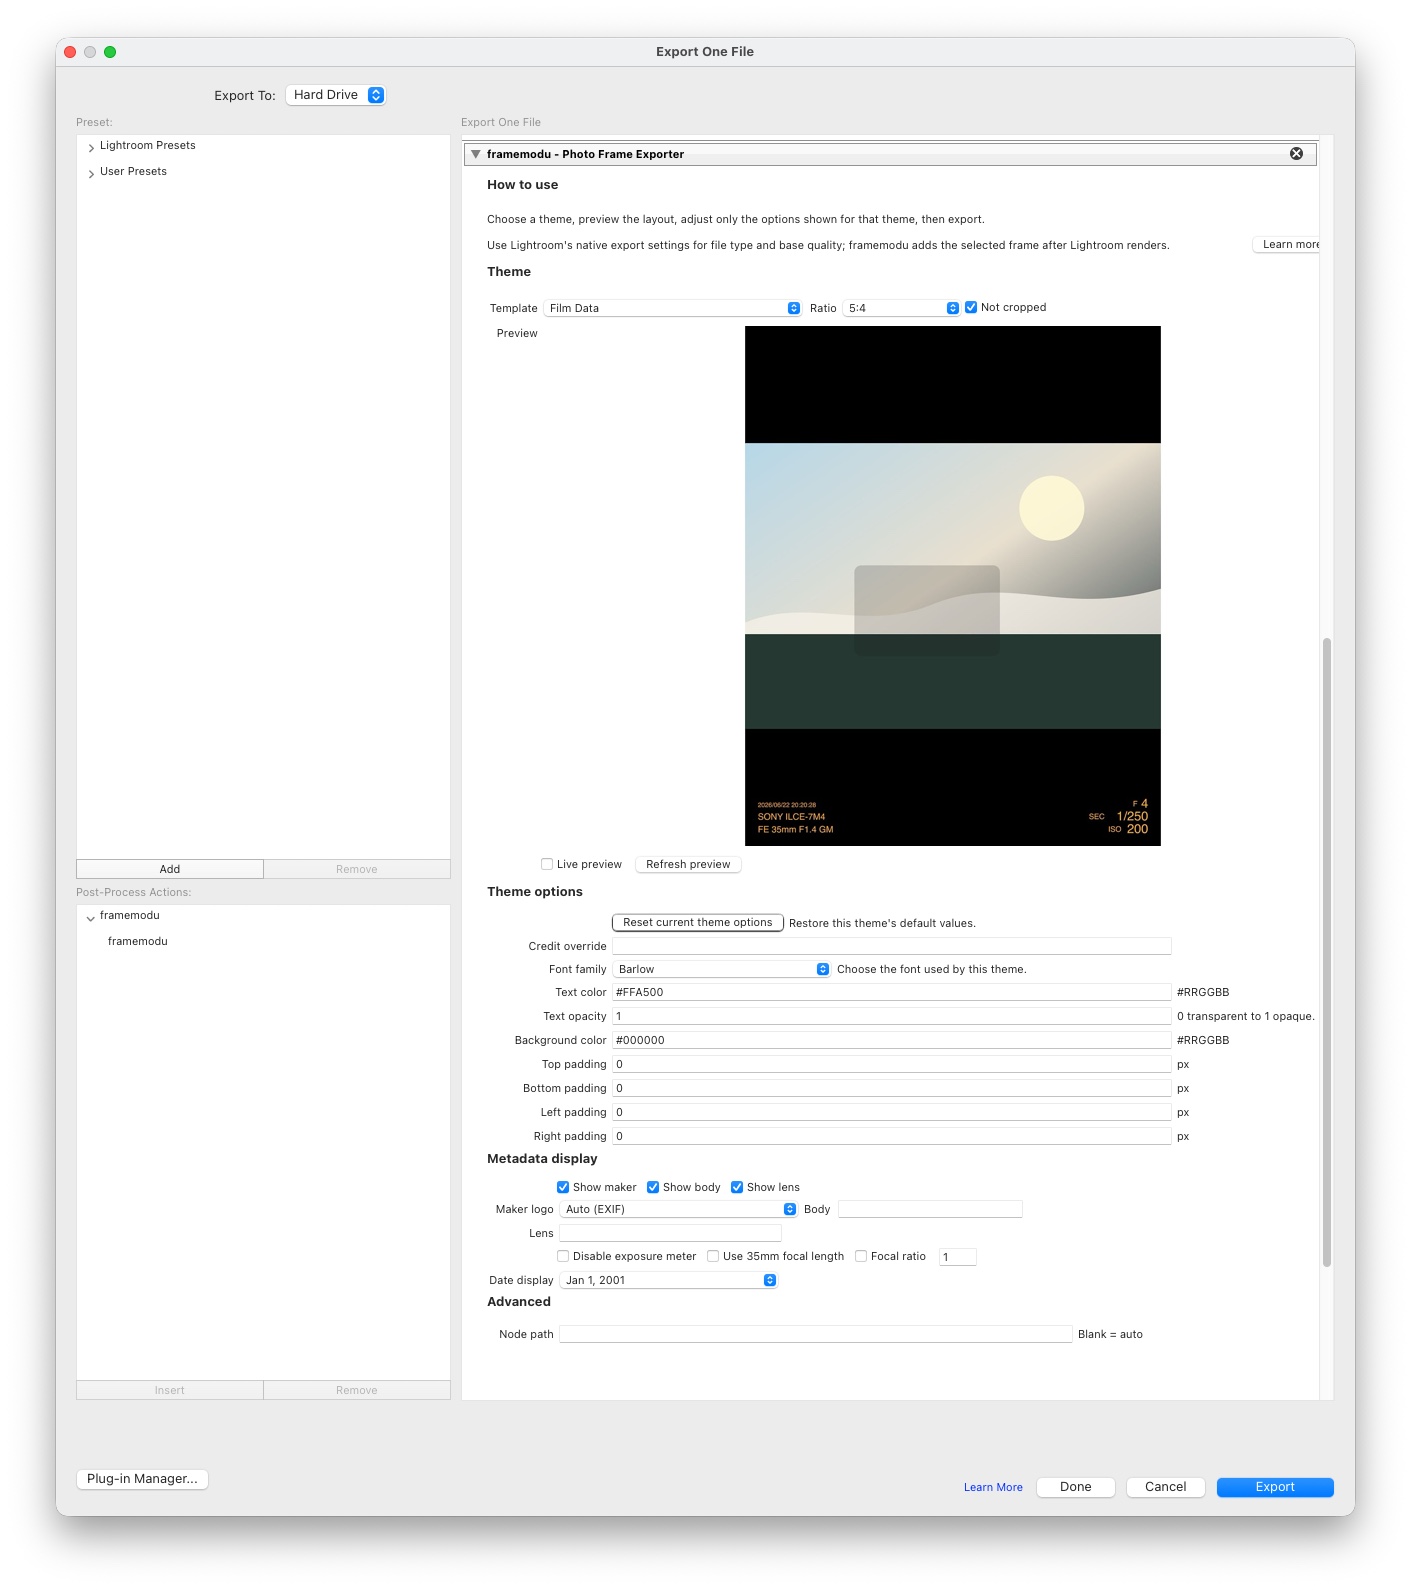
Before processing a full client set or portfolio batch, open File > Export, confirm that framemodu appears in Post-Process Actions, pick a simple template, and export one JPEG to a test folder.
- Use one selected photo for the first test.
- Keep Lightroom's native File Settings and Image Sizing choices conservative until the output looks correct.
- After the test file is correct, save the export settings as a preset for repeated work.
If framemodu does not appear
If the export filter is missing from Post-Process Actions, return to Plug-in Manager first. The most common cause is selecting a file inside the package instead of the full framemodu.lrplugin folder, moving the renderer folder after installation, or loading an older copy of the plug-in from a previous test package.
- Remove duplicate or stale framemodu entries before adding the fresh package again.
- Keep the installed plug-in folder in a stable location that Lightroom can keep reading.
- Restart Lightroom Classic after replacing the plug-in package or changing host-app language settings.
Before a full production batch
Treat the first export as a validation file. Open the rendered JPEG, check frame alignment, output ratio, metadata text, logo mode, and destination folder before saving a preset or exporting a full client gallery. This keeps Lightroom's native export choices and framemodu's post-process finish aligned.
- Use a small test set when changing templates or ratios.
- Compare one plain Lightroom export with one framemodu export when diagnosing output-size questions.
- Keep the successful settings as a named Lightroom export preset for repeatable delivery.
Related topics
- install Lightroom Classic plugin
- framemodu installation
- Lightroom Plug-in Manager
- Lightroom plugin renderer status